Signing up Free Apple ID for iTunes Store – the Guideline

You may need to purchase a range of digital music and digital products such as movies, apps, and audio books. We can say that the iTunes Store can be the great resource. It is important to have an iTunes account in case that you want to use the iTunes Gift Cards to buy or to redeem. Even it is the place to access any free downloads as well as services. Here’s how to signing up your Free Apple ID.

free apple id

Steps to signing up free Apple ID

It is possible for you to create your free iTunes account even though you do not have an iPod or iPad. This helps you to access Apple’s online store. Below, we provide you the guideline.

Steps:

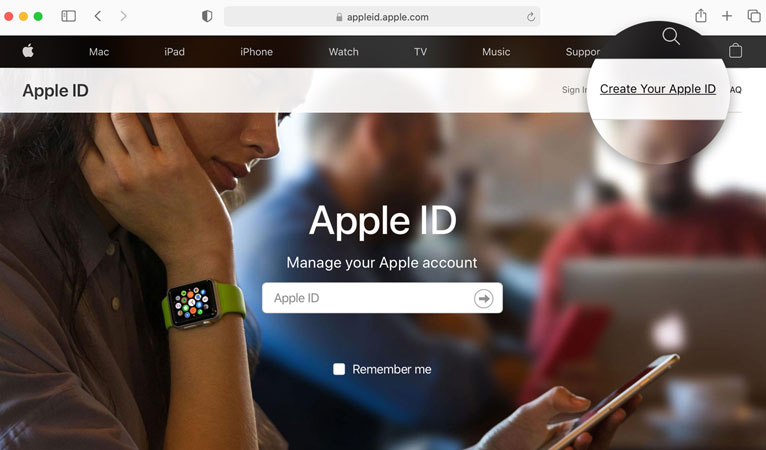
  1. Launch the iTunes. If you have this app on your computer, you need to download the latest version. To download, visit the iTunes website.
  2. Look at the left panel of the iTunes. Click the iTunes Store menu option (below the STORE section).

create new itunes

Click Sign In at the top of the right-hand side of the iTunes main window. Choose the Create New Account button displayed in the dialog screen.

  1. There is a welcome screen and click Continue. Then, you have to read the Apple’s terms and conditions. If you want to continue and you agree with these, click the check box at the side of I have read and agree to these terms and conditions. Click Continue to go to the next step.
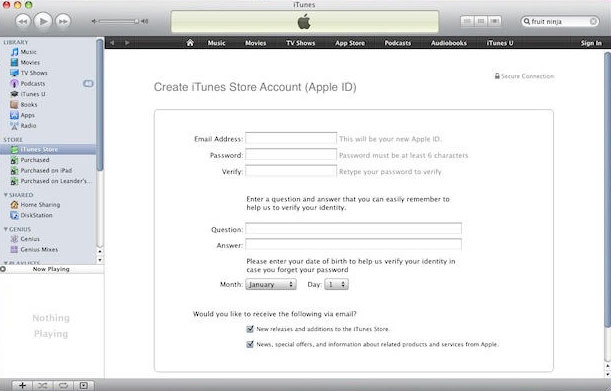
  2. You will see Apple ID Details screen and you must enter all the required information to create the iTunes account, such as our email address, birthday, and password. Fill the secret question to help you at any time when you forget about the security. Clear one or both check boxes if you do not want to get any communications from Apple through your email. Click Continue.
  3. If you want to pay by credit card, choose the type of your credit card by clicking one of the radio buttons. After that, you must enter the details of your cards based in the correct field. Enter your billing address details based on the credit card registration. Click the Continue button to proceed. However, if you use PayPal, not a credit card you must click Continue to verify the details of your PayPal. It will bring you to another screen through your internet browser to sign into your PayPal account. Click Agree and Continue button.
  4. Now, you have created your account. It is successful if you see a congratulations screen to verify that you have an iTunes account right now. Click Done button and finish.

Signing up Free Apple ID for iTunes Store – the Guideline Read More »

How to Reboot iPhone 12: Release Troubles Instantly

Are you the user of the iPhone 12? If so, you might ever experience some troubles while using it. When you find troubles like iPhone 12 frozen, network issues, worse performance, and any others, you can try to reboot it. Then, do you know how to reboot iPhone 12? If you never know about it, you can see the explanation below. There will be the right iPhone 12 manual to reboot your device. Just check them out.

reboot iphone 12

The right steps to reboot iPhone 12

To reboot your iPhone 12 successfully, you need to do the right steps. So, you can follow the steps below to make it happen. Here we go.

  1. Press the Volume up

First, you have to press this button that is located on the right side of the phone. Don’t forget to quickly release it after you press the button.

  1. Press the Volume down

After you do the first step, you can do the same to the Volume down button. You can press and release the button. It is located on the right side of the phone, under the Volume up button.

  1. Press and hold the side button

Last, you can end this action by pressing and holding the Side button. It is located on the left side of the phone. You can hold the button until you see the Apple logo occur on the screen of your phone. When the logo appears, you can release the button.

After you do this step, the iPhone 12’s screen will go dark. Then, it will start to shut down and also reboot automatically.

2 significant benefits of rebooting your iPhone

When you reboot your phone, you will get a few benefits. Here are the two significant benefits you will get. Check them out.

  1. Help the iPhone 12 resolve network issues

After you use your device for a long time, it is possible that your phone loses connection with the T-Mobile network. As a result, this condition will lead to network issues. So, by rebooting your iPhone 12, some issues like a poor signal, slow data speeds, messaging problems, and calling problems will be resolved.

  1. Improve the iPhone 12’s performance

Some open background applications on your phone will slow down its performance. When you always reboot your phone regularly, all of them will automatically be closed. Thus, when all apps are closed, your phone will get better performance.

Well, that is all about how to reboot your iPhone 12 to share with you. Just do it and get the benefits of rebooting your phone.

How to Reboot iPhone 12: Release Troubles Instantly Read More »

How to Share Your Phone but Protect Your Info on Google Pixel Phone

Sharing the phone with the other has been a habit for many people. Sometimes, people share and exchange some data or file in their phone to the others. However, people have to know that privacy is essential to be saved. For example, a personal file which can’t be seen by the other people.

Lately, Google Pixel Phone comes with the best way to protecting the info in a mobile phone. There is a step that can be used by people to save their privacy while they share some info. Well, the simple steps are below.

share your phone

The Steps to Share Your Phone but Protect Your Info on Google Pixel Phone

1. Open “Quick Settings.” You can Swipe down the top edge of the screen to open it.

2. Tap the user icon on the top right and select “Add a Guest” to start Google Guest Mode.

3. After that, tap the user icon and select “Remove Guest.”

4. Then, tap “Remove” to delete all apps and data that come from the guest’s session.

So, those are the steps how to protect your info during the sharing process. You may share some file with your friend without worry. You can still protect your privacy on the phone that can be seen by the other.

From the steps above, you have to know that you are the only one who can permit the sharing process. You can deny or allow the other to see or not about your private information.

Why did people should protect their info?

  • There are many valuable things on your phone.

It is possible that you save lots of personal thing in your phone. It can be some photos of memorable moments or some private videos. So, it can be a reason to protect your info.

  • There are more mobile phone viruses.

Your info in your phone may influence by some viruses from other during the sharing process.

Then, to avoid the things happen, you are recommended to follow the steps above when sharing the phone with other.

How to Share Your Phone but Protect Your Info on Google Pixel Phone Read More »

Scroll to Top